Anaconda is a great package manager for R and Python, as also as JupyterLab is a great interactive IDE. Although, when I started using these tools, I did not use all its capabilities. Said that, today I will show you how to install JupyterLab once and use all other your envs without leave the lab GUI.
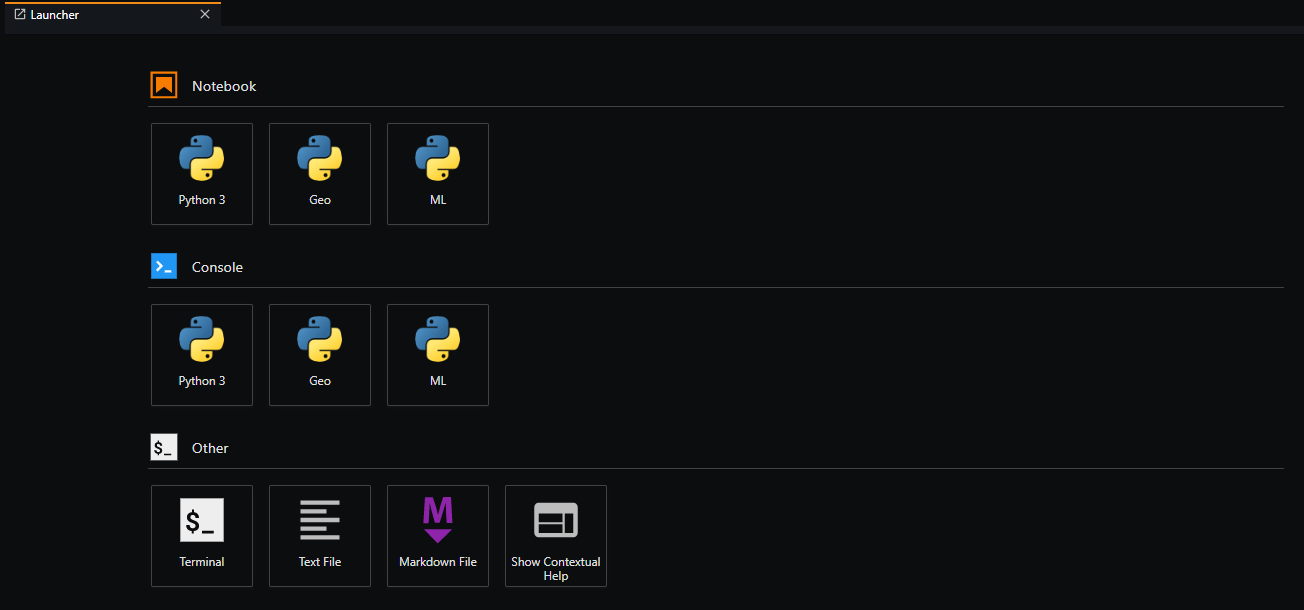
At the end, you will be able to choose on which env your notebooks will be running:
First, make sure you have Anaconda. I recommend you the Miniconda distribution. It does not come with nothing pre-installed but the essential.
Open your terminal or Anaconda prompt and create a conda env to host our JupyterLab installation.
conda create -n lab python=3.7 jupyterlab
I created a “lab” env, but feel free to name it the way you want.
After, create other conda envs matching your needs. I will create two envs: one for my machine learning studies and other for my geo processing projects. You can create whatever makes sense to your needs. Make sure to not forget the ipykernel installation.
conda create -n Geo python=3.7 ipykernel
conda create -n ML python=3.7 ipykernel
The Ipykernel is the engine responsible for the Jupyter interactive interpretation of Python. It will also allow us to use our conda environments from inside the Jupyter GUI. Let us continue and create new kernels for our envs:
ipython kernel install --user --name=ML
ipython kernel install --user --name=Geo
If you accidentally made some mistake you can remove the kernel.
jupyter kernelspec uninstall unwantedkernel
Is not mandatory use the same name for the kernel and the corresponding conda env but is a good idea. Matching labels help us to keep things clear and well organized. Finally, activate your JupyterLab env and start the server.
conda activate lab
jupyter lab
Now you can change between kernels without create new instances of JupyterLab. This setup means no need on installing JupyterLab in each conda env.